
How to Create Free Landing Pages in Squarespace
Have you received ads in your inbox or news feed with fancy landing pages asking you to do one thing or another? Maybe you thought to yourself, it would be great to be able to take advantage of the ad to promote your business, course or event? Leadpages and Instapages are great options for you if you want to shell out money to use their landing pages!! I know if there was another alternative, free at that, you would be interested. And Yes, you do have another option. I can show you how to make these beautiful landing pages right in your Squarespace account.

That’s why today, I’m showing you how to create free landing pages in Squarespace. Why pay for another service when you can do it all in Squarespace, right? Don’t worry about Instapages or LeadPages. If you budget does not allow for those services, Squarespace has this feature built right in.
Elements of a successful landing page
First, let’s talk about what makes a useful landing page.
Your landing page should have one set goal that your reader is supposed to do.
You don’t want to have a landing page asking your reader to subscribe, buy something, follow you on social media, and sign-up for your webinar. That’s overloading them with too many choices, and they’ll probably leave the page, without doing any of the above.
Instead, give them one clear goal to follow through with.
To use an example for this tutorial, let’s try to get your blog reader to subscribe to your e-mail list. A favorite way to do this with an e-mail opt-in, aka a freebie that your subscriber can download.
Your landing page needs these components:
The “copy” or the written element that convinces your reader to become a subscriber
A small graphic showing them what they are subscribing for
A form to enter their e-mail address, also known as the “call to action.”
That’s it! This can be done right on Squarespace.
Your Squarespace landing page
First, create a page on the back end of your Squarespace account. By back end, I mean login in to your Squarespace account. If you haven’t decided on a template for your Squarespace website yet, you know that I like the Brine template.
In your home page, click Pages.

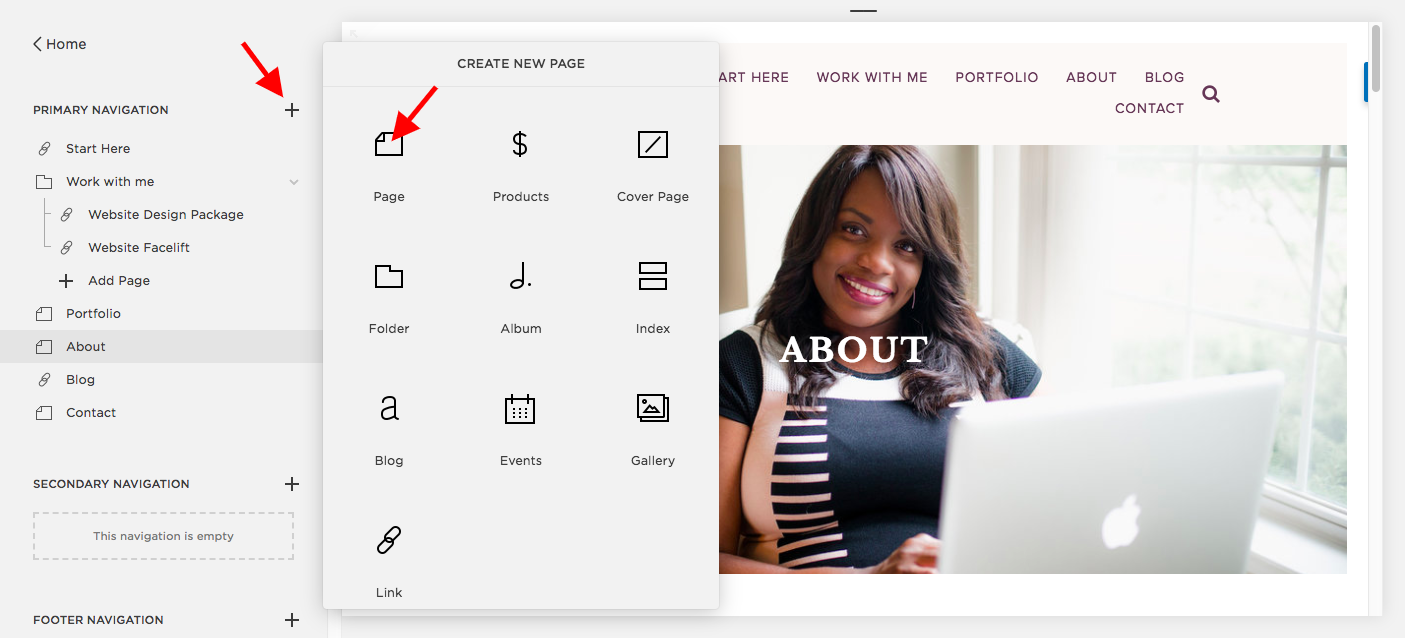
Click the + button and then click Page.
Add the text, image, and call to action.

The last step is to remove the navigation from the top of your landing page and remove the footer. Remember when I said that your landing page needs to have one clear goal in mind? We don’t want your readers navigating away from that landing page unless they are completing the goal that you have set for them. That’s why we want to remove the excess.
To help us remove that excess, we are going to add a little bit of code that will do the trick! Don’t start panicking, you can do this.
In the page, head to Settings. Then click on Advanced. In the Header Code Injection, you are going to paste this code exactly as you see it:
<style>
#footerBlocksTop, #footerBlocksMiddle, #footerBlocksBottom {
display: none !important;
}
.sqs-announcement-bar-custom-location {
display: none !important;
}
.Header, .Header--top {
display: none !important;
}
.Header-inner, .Header-inner--bottom; {
display: none !important;
}
.Header-inner, .Header-inner--bottom {
display: none !important;
}
.Footer-inner, .clear {
display: none !important;
}
</style>

That’s all there is to it. This code might not work for every template that Squarespace has, but for Brine, this will work.
Now you have a beautiful landing page that you created for free right in Squarespace.

I’d love to see what kind of landing pages you created with this tutorial. In the comments below, drop me a link to your landing page. I’ll check it out.
